Making a Static Blog With Hugo
When I started this blog, I was not prepared for the number of options for how and where to host it. After consider many different platforms I decided to go with a static site generator. Hugo own tag line sums up what it does very well:
“Hugo is one of the most popular open-source static site generators. With its amazing speed and flexibility, Hugo makes building websites fun again.”
The tag line is true. Hugo is amazingly fast and very flexible but flexibility comes at the cost of a learning curve. It has taken me more time to get my site going with Hugo but maintanence will be greatly reduced due to the static nature of the site.
Does Hugo make building websites fun again? Let’s look at getting setup and find out.
Install Hugo
Hugo has many different release options including many package managers. I am installing on Windows and could have used Chocolatey. I choose instead to go to GitHub and look thru the many different Hugo releases.
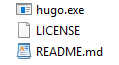
I choose hugo_0.40.1_Windows-64bit.zip and unzipped the files into a directory I created named “hugo”.
Create Website
On the command prompt:
hugo new site [sitename]
Example:
hugo new site WittyWebsite
That was easy… A directory was created with your [sitename]. You directory contents should look similar.
![Directory Contents of [sitename]](/img/hugo/sitenamedirectory.png)
Install Hugo Theme
First you need to pick a theme! Then get the link on the download button and go back to your command prompt.
Change directory to [sitename]:
cd [sitename]
Then you run git to add your chosen theme.
git submodule add [git theme url] themes/[theme name]
Example: (I liked this theme and used it myself as the template for this blog)
git submodule add https://github.com/htr3n/hyde-hyde.git themes/hyde-hyde
Thank you to htr3n for such a great starter theme!
Next you need to set your chosen theme as the default for Hugo. Look for your config file in your [sitename] directory. I have chosen to use YAML for mine and my file is named ‘config.yaml’.
Edit this file and add / edit your ‘theme’ value to [theme name].
theme: [theme name]
Example:
theme: aglaus
Important: Themes in Hugo are not necessarily interchangeable. The engine behavior is what is consistent between the different themes. Configuration settings and template files / layouts will often be quite different. Each theme should come with a README file that I recommend you look thru for different options.
Customize Hugo
Do not overwrite your theme. Instead override your theme. In your site directory create a folder named ‘layouts’ and then place the same files in it that you wish to override. Example:
/themes/[theme name]/layouts/_default/single.html
Would be overwritten by
/layouts/_default/single.html
Notice the folder structure must match from the ‘layouts’ folder in both locations.
Add Content
You can manually create content in the ‘content’ folder or you can have Hugo generate it for you from the command line. The only benefit to the command line is Hugo will populate your Markdown file with your Front Matter.
hugo new blog/my-first-blog-post.md
Then edit the generated file in your editor of choice.
Generate Web Site
Just run Hugo with no parameters and it will generate your static site in the ‘public’ folder.
hugo
What Next?
Hugo offers many options and features and this was a quick guide recording what I did to get this blog running. Check the documentation for the specifics of what you are wanting to accomplish.